

Last updated on October 13th, 2026 at 04:56 pm
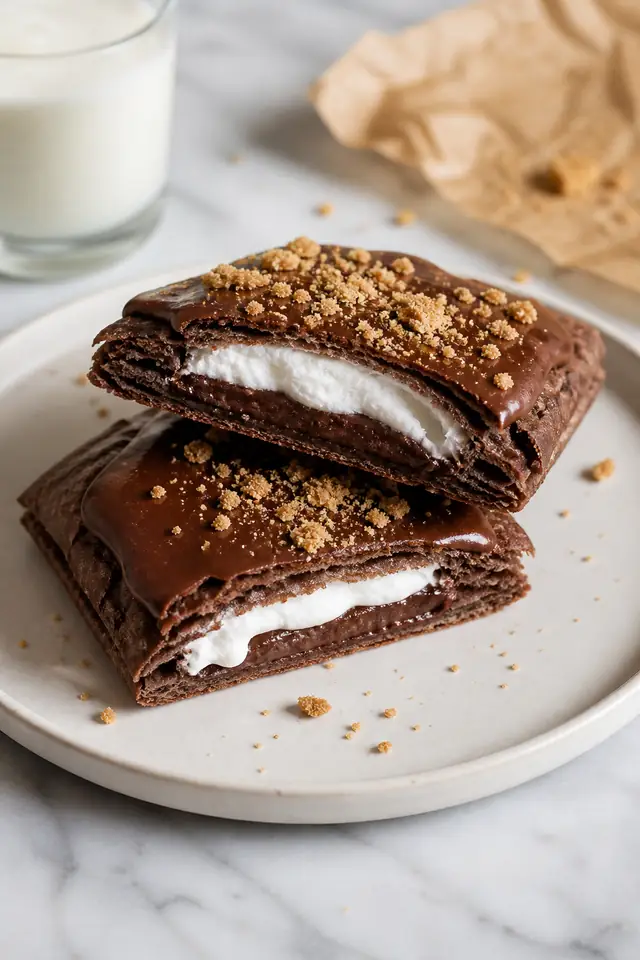
Chocolate pastry, marshmallow cream, and graham crumbs make homemade s’mores pop tarts feel like a campfire dessert tucked inside a breakfast pastry. This version gives you a flaky cocoa-graham crust, a thick chocolate center, and a glossy glaze that sets without hiding the gooey filling.
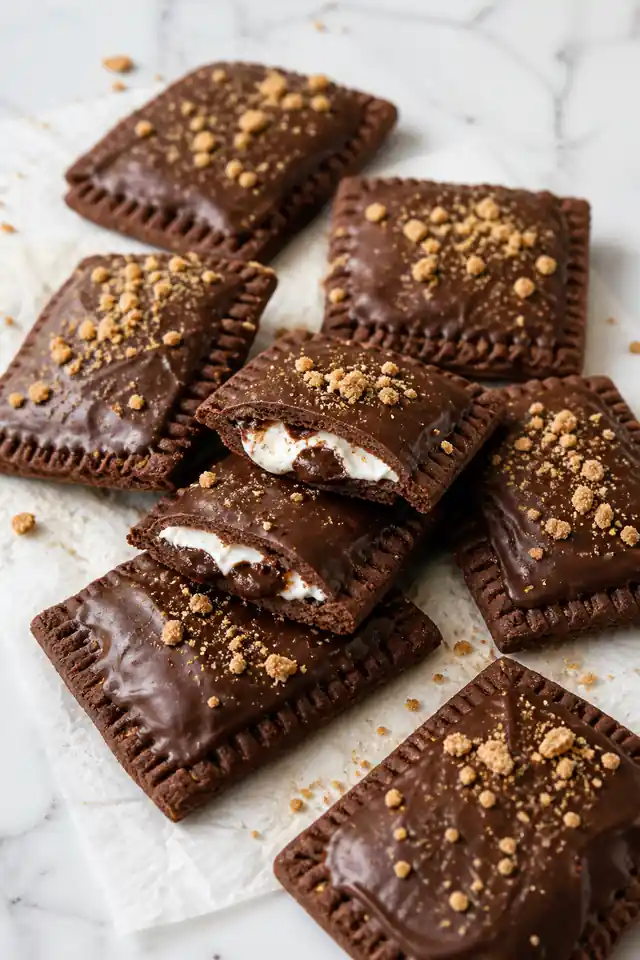
The secret to these chocolate marshmallow pop tarts is keeping the filling controlled and the pastry cold. A thin layer of chocolate filling and a small spoonful of marshmallow creme give each pastry its s’mores flavor, while a clean border and firm crimp help keep everything inside as it bakes.
If you enjoy making nostalgic toaster pastries from scratch, our homemade Pop Tarts recipes collection brings together more fruit-filled, chocolate-filled, and classic frosted variations.
Table of Contents
Why These Homemade S’mores Pop Tarts Work
This s’mores pop tarts recipe combines cocoa-graham pastry, thick chocolate filling, and a small layer of marshmallow creme. Finely ground graham crackers add the familiar s’mores flavor, while cooling the chocolate filling before assembly helps prevent leaks and keeps the pastry easier to seal.
- Chocolate-graham pastry: Cocoa and fine graham crumbs make the crust taste like the flavor, not just look like it.
- Thick filling: Chocolate chips, cream, and butter cool into a spreadable layer that does not run quickly.
- Controlled marshmallow: A teaspoon of marshmallow creme gives the classic white center without overfilling.
- Chilled assembly: A short freeze before baking helps the edges stay sealed.
- Set glaze: Chocolate frosting and graham crumbs make the pastries look like frosted s’mores pop tarts without needing boxed pastry.
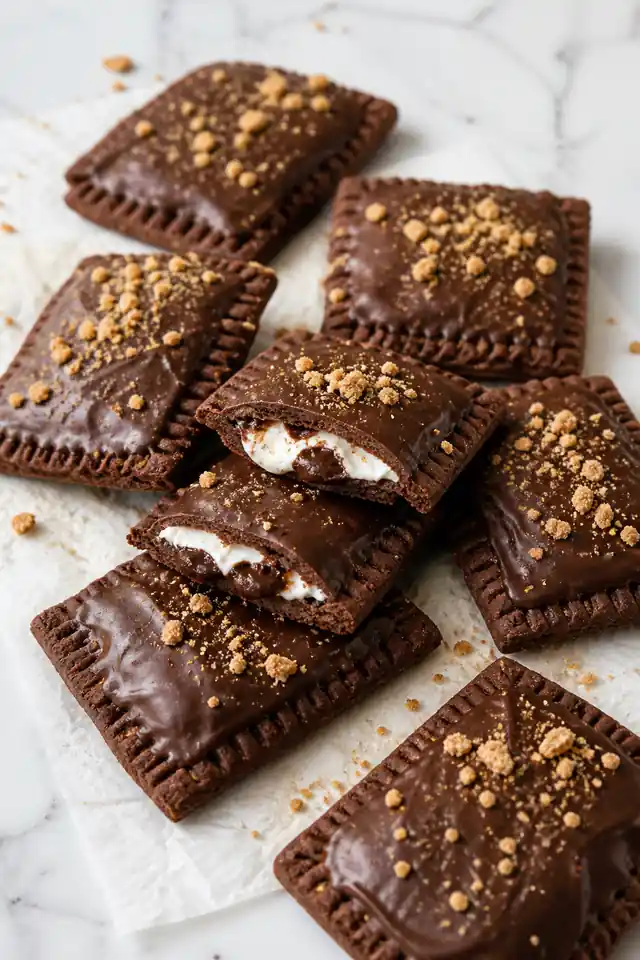
Homemade S’mores Pop Tarts
Ingredients
Equipment
Method
- Make the dough: Pulse flour, graham crumbs, cocoa, powdered sugar, and salt in a food processor. Add cold butter and pulse to pea-sized pieces. Add ice water gradually until the dough holds together when squeezed.
- Chill the dough: Divide into two portions, shape into 1-inch-thick rectangles, wrap, and refrigerate for at least 1 hour.
- Prepare the filling: Melt chocolate chips, heavy cream, and butter over low heat, stirring until smooth. Cool until thick and spreadable.
- Roll and cut: Roll each dough half into a 10 × 12-inch rectangle, about ⅛ inch thick. Cut each into eight 3 × 5-inch rectangles to make 16 pieces total.
- Fill and seal: Add 2 teaspoons cooled chocolate filling and 1 teaspoon marshmallow creme to each of eight bottom rectangles, leaving a ½-inch border. Brush the edges with egg wash, add the pastry tops, press out air, and crimp firmly.
- Chill and bake: Vent the tops, brush lightly with egg wash, and freeze for 10 minutes. Bake at 375°F (190°C) for 22–26 minutes, until the edges are firm and the bottoms look dry.
- Glaze and finish: Cool completely, approximately 30 minutes. Whisk powdered sugar, cocoa, milk, melted butter, and vanilla into a thick glaze. Spread over the pastries, sprinkle with graham crumbs, and let set for 25–30 minutes.
Notes
- Store glazed pastries in a single layer in an airtight container at room temperature for up to 2 days or refrigerate for up to 5 days.
- Freeze baked, unglazed pastries for up to 2 months. Warm, cool, and glaze before serving.
- Do not put glazed homemade pop tarts in a slot toaster.
Ingredient Notes
The chocolate-graham pastry, creamy chocolate filling, and marshmallow creme give these homemade s’mores pop tarts their familiar campfire-inspired flavor. Each ingredient plays a part in keeping the pastry tender, the filling thick, and the glaze smooth.
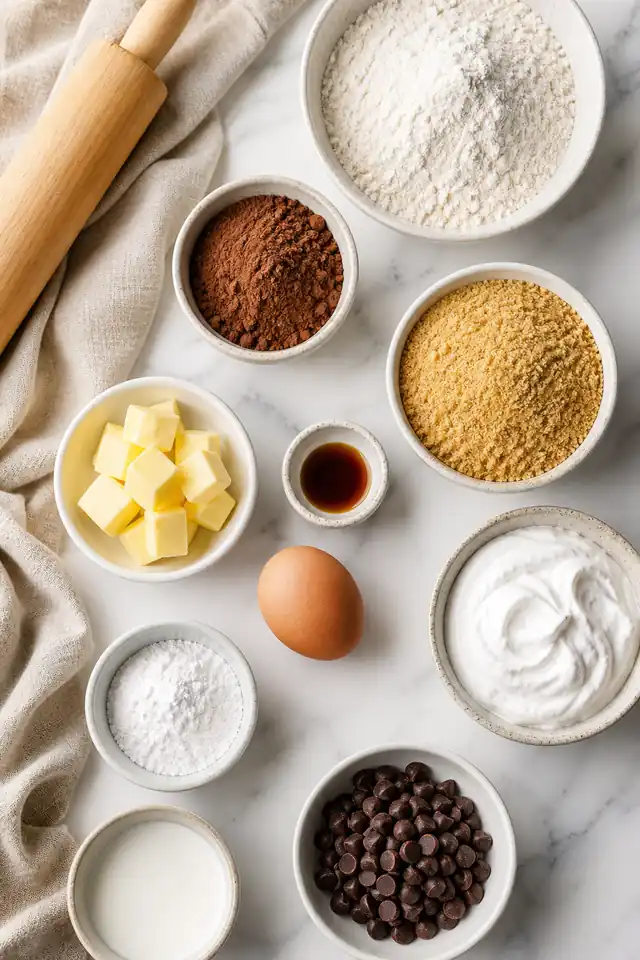
Chocolate-Graham Pastry
Graham cracker crumbs: Grind the crackers finely so they blend evenly with the flour and cocoa powder. Large crumbs can make the dough harder to roll and create uneven spots in the pastry.
Unsweetened cocoa powder: Adds chocolate flavor to both the pastry and glaze. Use plain unsweetened cocoa powder rather than sweetened hot chocolate mix.
All-purpose flour: Provides the structure needed to roll the dough into thin rectangles and hold the filling without tearing.
Cold unsalted butter: Keep the butter chilled and cut it into small cubes before mixing. Small pieces of butter help create a tender, flaky crust. If the dough becomes soft while working, refrigerate it briefly.
Ice water: Start with 6 tablespoons and add more only if the dough remains crumbly. The mixture should hold together when squeezed without feeling sticky. Avoid adding all the water at once, as too much moisture can make the pastry difficult to roll and seal.
Chocolate and Marshmallow Filling
Semisweet chocolate chips: Form the base of the chocolate filling. As the mixture cools, the chocolate thickens into a spreadable layer that stays more easily inside the pastry.
Heavy cream and butter: Combine with melted chocolate to make a smooth, ganache-style filling. Let it cool until thick enough to hold its shape on a spoon before assembling the pastries.
Marshmallow creme: Use only 1 level teaspoon per pastry. Too much can spread toward the edges during baking and interfere with the seal. Choose gelatin-free marshmallow creme or verify the gelatin source before using another product.
For another way to enjoy this familiar combination, our homemade s’mores cookies bring chocolate, graham crackers, and marshmallow together in a classic cookie rather than a filled pastry.
Chocolate Glaze and Topping
Powdered sugar and cocoa powder: Create a sweet chocolate glaze that sets over the cooled pastries. Sift out any large lumps for a smoother finish.
Milk: Add gradually until the glaze is thick but spreadable. Too much liquid can make it run down the sides instead of staying on top.
Melted butter and vanilla: Butter gives the glaze a smoother consistency, while alcohol-free vanilla adds flavor without overpowering the chocolate.
Graham cracker crumbs: Sprinkle them over the glaze while it is still wet so they stick to the surface. Use finely crushed crumbs for an even finish.
How to Make Homemade S’mores Pop Tarts
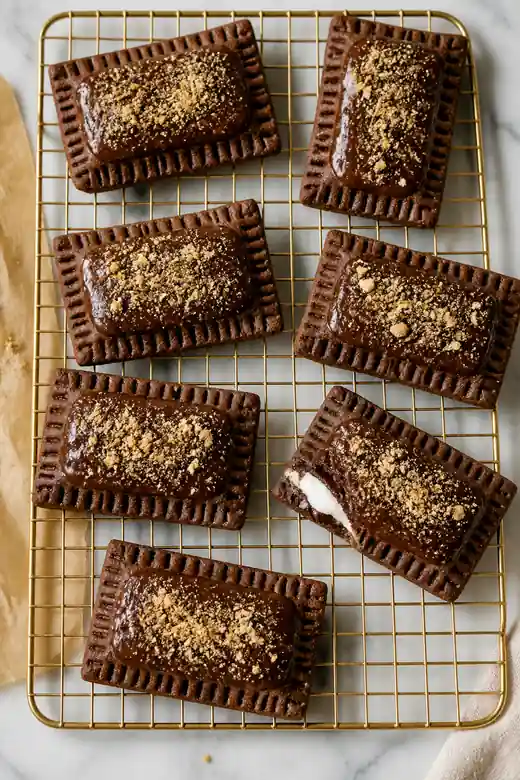
Making these chocolate marshmallow pop tarts involves chilling the chocolate-graham dough, preparing a thick chocolate filling, and sealing the pastries before baking. Allow approximately 3 hours 20 minutes from start to finish, including cooling and glaze setting.
Total time: 3 hours and 20 minutes
-
Make the chocolate-graham dough
Pulse the flour, finely ground graham cracker crumbs, cocoa powder, powdered sugar, and salt in a food processor until evenly mixed. Add the cold butter cubes and pulse until the mixture resembles coarse crumbs with some pea-sized pieces remaining.
Add 6 tablespoons of ice water gradually, pulsing briefly after each addition. If the dough still crumbles when squeezed, add more water, 1 tablespoon at a time, up to 8 tablespoons total.
Divide the dough into two equal portions and gently shape each into a 1-inch-thick rectangle. Wrap and refrigerate for at least 1 hour.
Important cue: The dough should hold together without feeling wet or sticky. Avoid overprocessing, which can make the pastry less tender. -
Prepare the chocolate filling
While the dough chills, combine the semisweet chocolate chips, heavy cream, and butter in a small saucepan over low heat. Stir until the chocolate melts and the mixture becomes smooth.
Transfer the filling to a bowl and let it cool until thick but spreadable. It should hold a soft mound on a spoon instead of running like a thin sauce.
Important cue: Do not spread warm chocolate filling onto the chilled pastry. The heat can soften the dough and make sealing more difficult. -
Roll and cut the pastry
Remove one chilled dough portion and roll it on a lightly floured surface into a 10 × 12-inch rectangle, about ⅛ inch thick. Trim the edges and cut into eight rectangles measuring 3 × 5 inches.
Repeat with the remaining dough to make 16 rectangles in total. Arrange eight pieces on a parchment-lined baking sheet for the pastry bottoms, keeping the other eight chilled until needed.
Important cue: Keep the thickness even and avoid stretching the dough. If it becomes too soft or sticky, refrigerate briefly before continuing. -
Fill and seal
Spread 2 level teaspoons of cooled chocolate filling in the center of each bottom rectangle. Add 1 level teaspoon of marshmallow creme over the chocolate, keeping a clean ½-inch border around all four edges.
Whisk the egg with 1 teaspoon water and lightly brush the exposed pastry borders. Cover with the remaining rectangles, gently press around the filling to remove trapped air, and crimp firmly with a fork.
Important cue: Keep chocolate and marshmallow off the sealing edges. A clean border helps the pastry layers stick together and reduces filling leaks during baking. -
Vent, chill, and bake
Prick the top of each pastry a few times with a fork or make small steam vents with a sharp knife. Brush the tops lightly with egg wash, then freeze the assembled pastries for 10 minutes.
Meanwhile, preheat the oven to 375°F (190°C).
Bake for 22–26 minutes, rotating the baking sheet halfway through if necessary. The pastries are ready when their edges feel firm and the bottoms appear dry rather than soft or shiny.
The clean-border, venting, and chilling techniques used here are also covered in King Arthur Baking’s homemade toaster tarts recipe, which provides additional guidance for preparing filled pastries.
Important cue: Chocolate pastry does not brown as visibly as plain pastry. Check the texture and firmness of the edges rather than relying on color alone. -
Glaze and finish
Transfer the baked pastries to a wire rack and let them cool completely, approximately 30 minutes or longer if needed.
Whisk together the powdered sugar and cocoa powder. Add 2 tablespoons milk, the melted butter, and alcohol-free vanilla extract. Stir until smooth, adding the remaining milk gradually if the glaze needs thinning.
Spread a layer of chocolate glaze over each cooled pastry, leaving a narrow border around the edges. Immediately sprinkle with finely crushed graham cracker crumbs.
Allow the glaze to set for 25–30 minutes before serving.
Important cue: The glaze should spread easily without running off the pastry. If it is too thin, add a little more powdered sugar. Always glaze completely cooled pastries so the frosting can set properly.
Success Tips for Frosted S’mores Pop Tarts
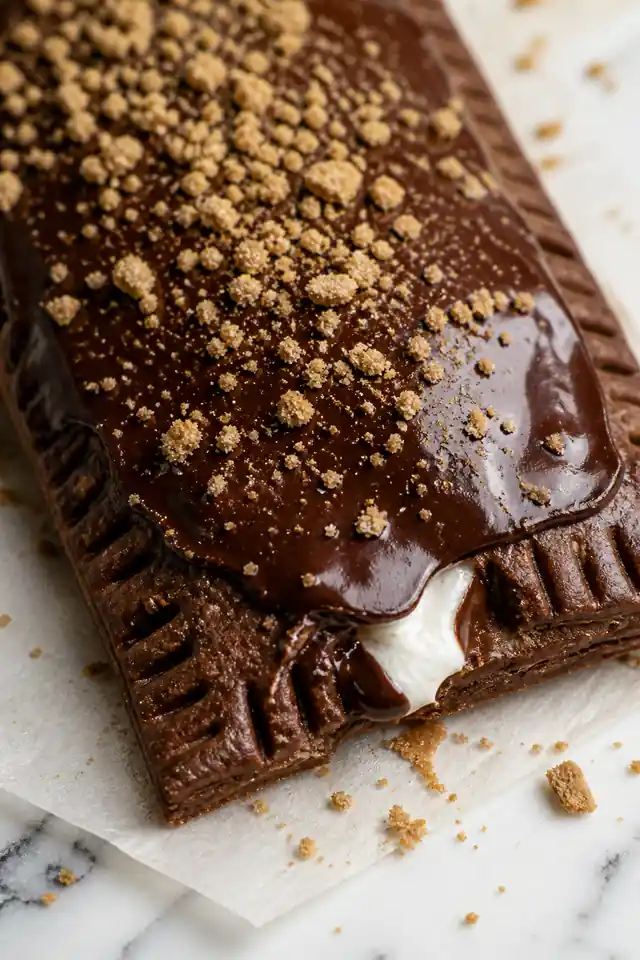
- Keep the marshmallow layer small. More filling sounds good, but it can leak or vanish into the crust.
- Dust off extra flour before sealing so the pastry layers can stick together.
- Crimp with the fork tines facing down, then turn the pan and crimp the opposite direction for a stronger edge.
- Let the glaze fall in a slow ribbon from the whisk. If it runs like milk, add more powdered sugar.
- Add graham crumbs while the glaze is wet so they stick neatly.
Variations, Shortcuts, and Air Fryer Notes
- Store-bought pie crust: Refrigerated pie crust can replace the homemade chocolate-graham dough, but the finished pastry will have a plainer flavor. Two standard 9-inch pie crust rounds will not provide enough dough for sixteen full-size 3 × 5-inch rectangles without excessive stretching. Make smaller pastries or use additional dough, reducing the filling in proportion to their size. Keep the same clean ½-inch sealing border and begin checking smaller pastries earlier.
- If you use refrigerated pie crust, chill the filled pastries before baking, even if the package says the dough is ready to use. Cold pastry is easier to handle and helps the crimped edges hold their shape as the filling heats.
- Air fryer option: An air fryer may work for smaller batches, but the baking time will depend on pastry thickness, filling quantity, and the appliance. Keep the pastries unglazed while cooking, leave space for air circulation, and check that the edges and bottoms are fully baked. The 375°F (190°C) oven method remains the recommended method for this recipe.
- More graham cracker flavor: Add a light sprinkle of finely crushed graham crackers over the chocolate filling before sealing, without increasing the overall filling volume. This gives the center a little extra graham flavor, but it does not create the browned flavor of marshmallows toasted over a flame.
For another chocolate-filled variation that starts with prepared pastry, try our homemade Nutella Pop Tarts. They offer a different chocolate-hazelnut filling without requiring the homemade chocolate-graham dough.
Storage, Freezing, and Reheating
- Refrigeration: Once the pastries have cooled completely and the glaze has set, store them in an airtight container in the refrigerator. Arrange them in a single layer when possible, or separate layers with parchment paper to protect the frosting. Let chilled pastries stand briefly at room temperature before serving if you prefer a softer filling.
- Freezing: For a make-ahead option, the baked pastries can be frozen before glazing, although the texture after thawing has not been verified for this specific recipe. Cool completely, wrap individually, and place in a freezer-safe container. Thaw in the refrigerator before warming, then cool completely before adding the glaze.
- Reheating: Warm unglazed pastries gently in a preheated 325°F (165°C) oven or toaster oven, checking frequently to avoid overheating the chocolate-marshmallow center. Allow them to cool before glazing. Do not put glazed pastries in a vertical slot toaster, where frosting or filling can contact the heating elements.
Frequently Asked Questions
More Homemade Pop Tarts to Try
For more homemade pastry variations, these three recipes offer different fillings, toppings, and flavors:
- Homemade Brown Sugar Cinnamon Pop Tarts: A classic spiced alternative to the chocolate flavors..
- Homemade Chocolate Fudge Pop Tarts: A chocolate-focused variation without the marshmallow layer.
- Homemade Cookies and Cream Pop Tarts: A different dessert-inspired filling for fans of chocolate pastries.
Save These Homemade S’mores Pop Tarts
Save this recipe to your chocolate desserts or weekend baking board. These homemade toaster pastries combine a chocolate-graham crust, marshmallow center, and rich chocolate glaze.