
Last updated on October 15th, 2026 at 07:22 pm
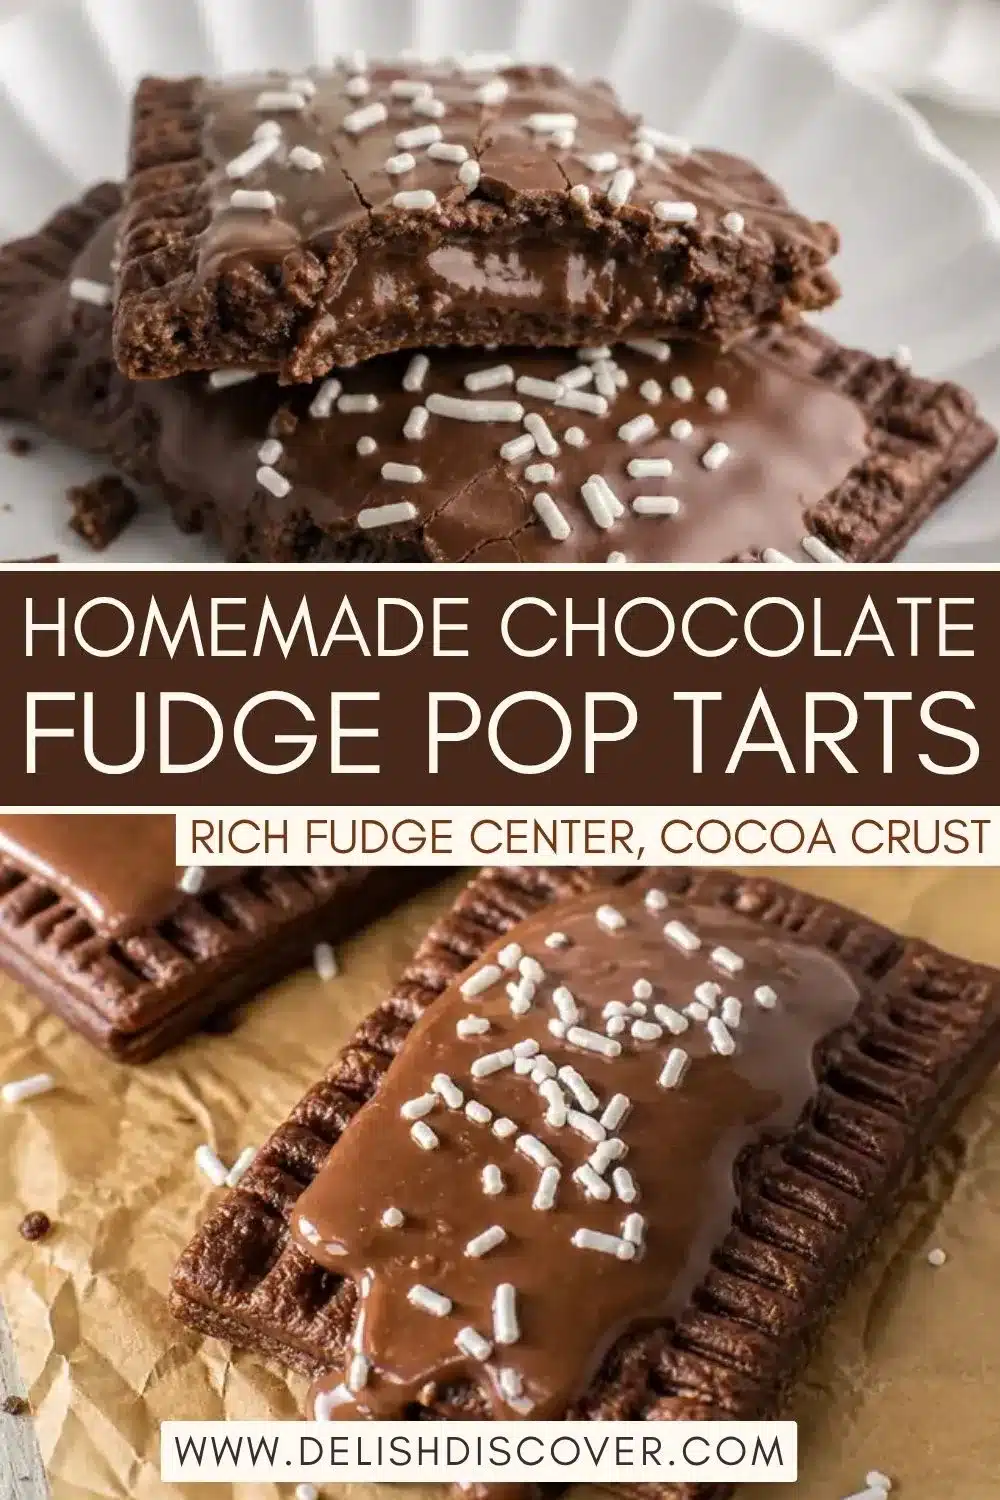
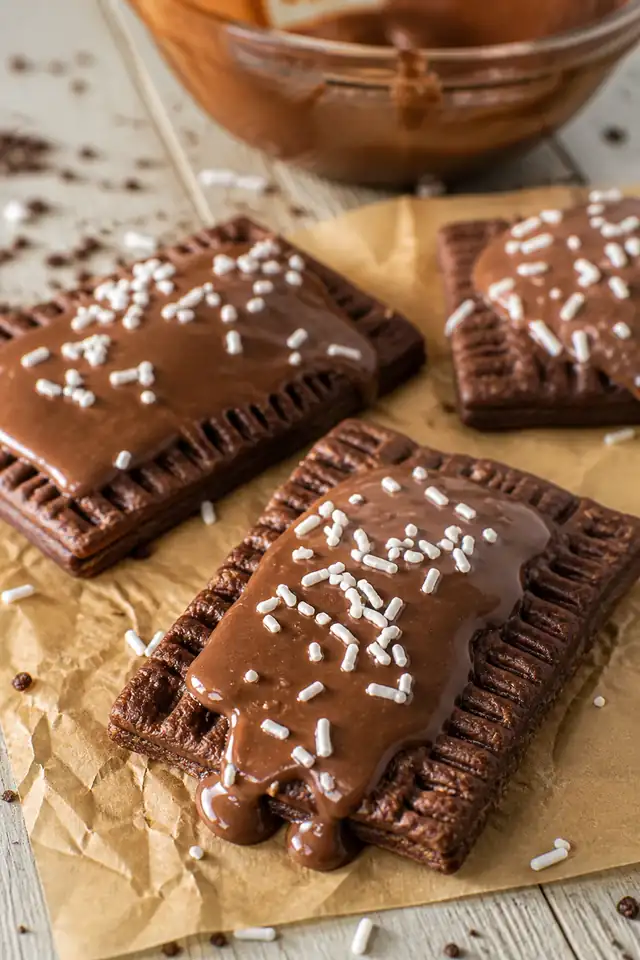
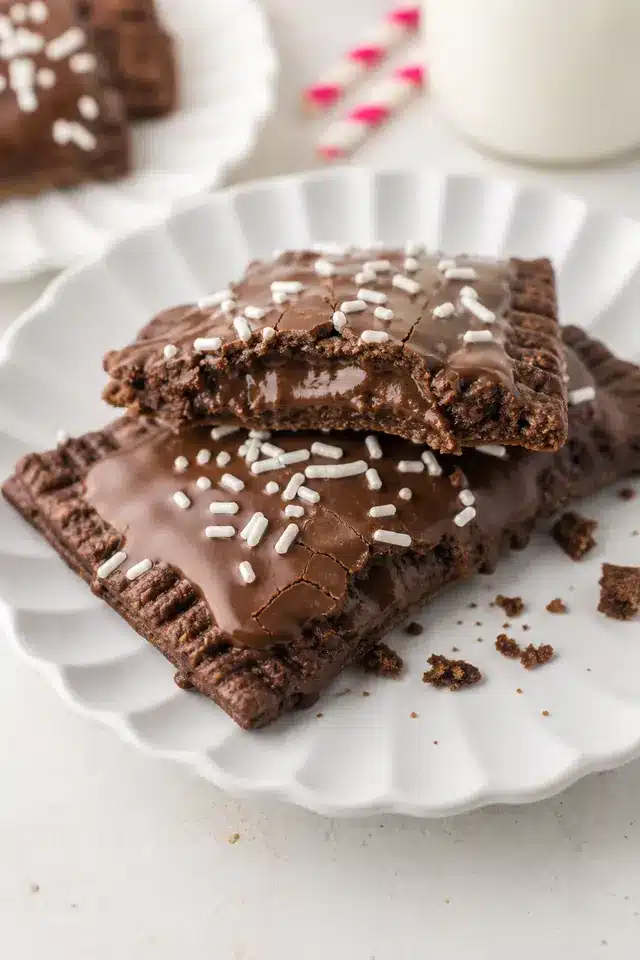
These homemade chocolate fudge pop tarts are made with a buttery cocoa pastry, cooked chocolate fudge filling and thin chocolate icing topped with white sprinkles. The recipe makes 9 rectangular pastries with chocolate in the dough, filling and topping.
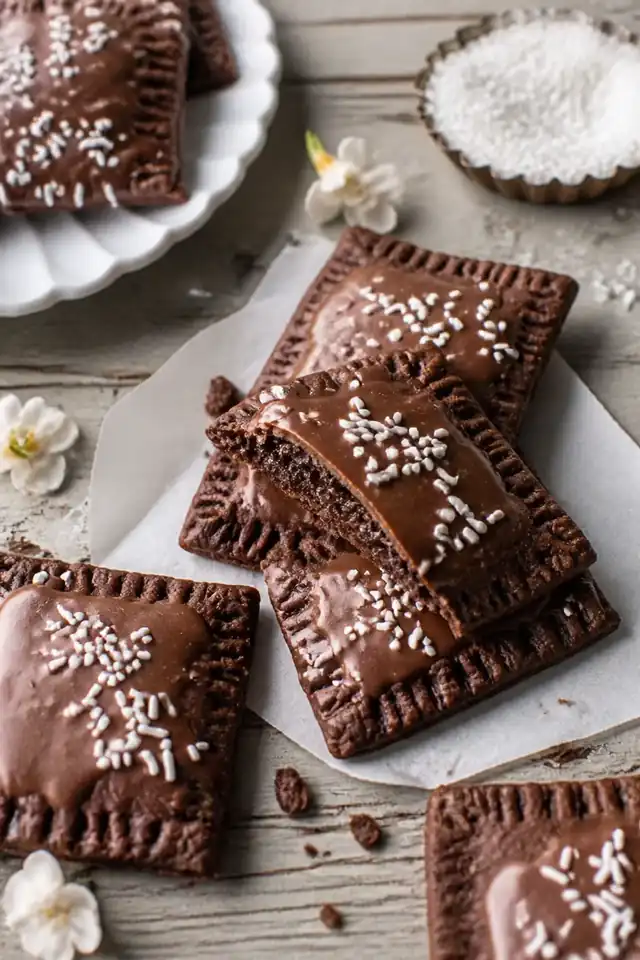
Plan ahead for the two-hour dough chill, a 20-minute freezer rest after assembly, and complete cooling before icing. Thick, cooled filling and clean pastry borders help reduce leaks. For other fillings and finishes, browse our homemade Pop Tarts recipes.
Table of Contents
Why These Homemade Chocolate Fudge Pop Tarts Work
Homemade chocolate fudge pop tarts work best when the pastry and filling have opposite textures. The dough needs enough butter to bake tender and crisp, while the fudge needs to cool into a spreadable paste that stays where you put it.
- Cold-butter cocoa pastry: Visible butter pieces and a chilled dough help the pastry bake tender rather than becoming a dense, overworked shell.
- Cooled chocolate filling: The cooked fudge thickens as it cools, making it easier to portion without spreading onto the sealing border.
- Measured assembly: Matching rectangles, a clean ½-inch border, firm crimping, and a short freezer rest help the pastries hold their shape during baking.
Homemade Chocolate Fudge Pop Tarts
Ingredients
Equipment
Method
- Pulse flour, cocoa powder, granulated sugar, and salt. Add cold butter and pulse until the mixture has pea-size pieces. Add ice water just until the dough holds when squeezed.
- Divide the dough in half, press each half into a 1-inch-thick rectangle, wrap, and chill for at least 2 hours.
- Whisk cocoa powder, brown sugar, milk, salt, and half the chopped chocolate in a small saucepan over medium heat until smooth and thickened. Remove from the heat and stir in the remaining chocolate, butter, and vanilla. Cool until thick but spreadable.
- Roll each dough half to a 9-by-12-inch rectangle about 1/8 inch thick. Cut each sheet into nine 3-by-4-inch rectangles for 18 pieces total.
- Add about 1 tablespoon cooled fudge to each bottom rectangle, leaving a clean 1/2-inch border. Brush the border with egg wash, top with pastry, press out air, crimp firmly, and prick the tops.
- Freeze assembled pastries for 20 minutes while the oven heats to 375 degrees F (190 degrees C). Brush lightly with egg wash and bake 22-26 minutes until the edges look dry and set.
- Cool completely. Whisk powdered sugar, cocoa powder, corn syrup, milk, and vanilla into a thick but spreadable glaze. Spread thinly, add sprinkles, and let dry to a light touch.
Notes
- Keep the filling thick and cool before assembly to reduce leaks.
- Freeze assembled unbaked pastries for 20 minutes before baking, or freeze airtight for up to 1 month.
- Store glazed pastries in a single layer at room temperature for up to 2 days.
- Do not put glazed homemade pop tarts in a slot toaster.
Ingredients for Homemade Chocolate Fudge Pop Tarts
These pastries have three chocolate elements: cocoa dough, cooked fudge filling, and chocolate icing. Keep the filling ingredients separate from the icing ingredients. The chopped chocolate goes in the filling, not the icing.
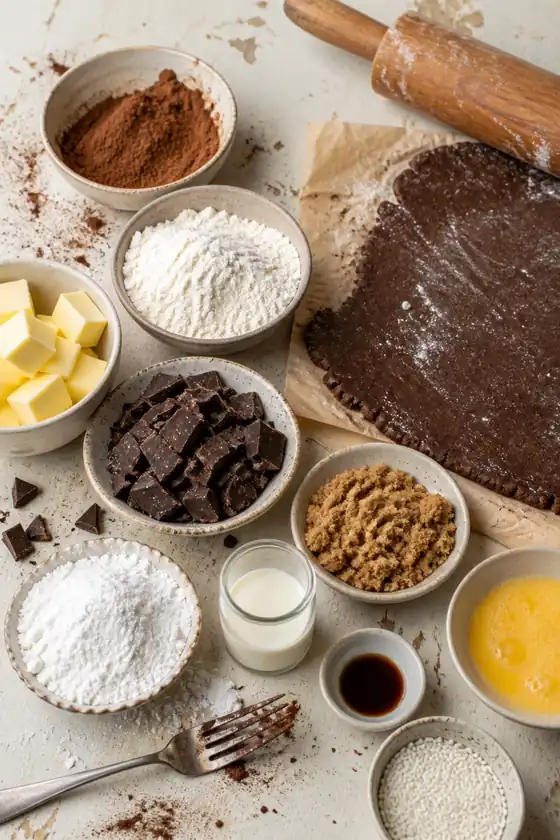
Chocolate Shortcrust Pastry for Pop Tarts
- 2½ cups (300 g) all-purpose flour, plus more for rolling
- ⅓ cup (about 28 g) unsweetened cocoa powder
- ⅓ cup (67 g) granulated sugar
- ½ teaspoon fine salt
- 1 cup (226 g) unsalted butter, very cold and cubed
- ½ cup (120 ml) ice water, plus 1–2 tablespoons more only if needed
Use unsweetened cocoa rather than drinking-chocolate mix. Because this chocolate shortcrust pastry for pop tarts contains no baking soda or baking powder, natural or Dutch-process cocoa can be used, although the color and flavor will differ. King Arthur Baking’s guide to cocoa types explains the distinction.
Keep the butter cold and stop mixing while pea-size pieces remain. Add water gradually, using the extra tablespoons only if the dough will not hold together when squeezed.
Chocolate Fudge Pop Tart Filling
- ⅓ cup (about 28 g) unsweetened cocoa powder
- ⅓ cup (67 g) packed light brown sugar
- ½ cup (120 ml) whole milk
- 1 pinch fine salt
- 4 ounces (113 g) semisweet chocolate, finely chopped and divided
- 1 tablespoon (14 g) unsalted butter
- 1 teaspoon alcohol-free vanilla flavoring
Divide the chopped chocolate into two equal portions. The first melts into the heated milk mixture; the second is stirred in after removing the saucepan from the heat.
The chocolate fudge pop tart filling should be cool and thick enough to hold a soft mound on a spoon before assembly. Save any excess rather than squeezing more into the pastries.
For a separate recipe using chocolate-hazelnut spread instead of cooked fudge, try our homemade Nutella pop tarts.
Egg Wash
- 1 large egg
- 1 tablespoon (15 ml) water
Whisk together until combined. Use a light coating on the clean pastry borders before sealing, then brush the tops before baking.
Chocolate Pop Tart Icing
- 1¼ cups (150 g) powdered sugar
- 2 tablespoons (about 10 g) unsweetened cocoa powder
- 1 tablespoon light corn syrup
- 2 tablespoons (30 ml) milk, plus a few drops if needed
- ½ teaspoon alcohol-free vanilla flavoring
- 2 tablespoons tiny white sprinkles or coarse sugar
Sift lumpy powdered sugar and cocoa before mixing. The chocolate pop tart icing should be thick but spreadable, not thin enough to run immediately over the edges. Add the sprinkles before the surface dries, choosing a product made without gelatin or other pork-derived ingredients.
How to Make Homemade Chocolate Fudge Pop Tarts
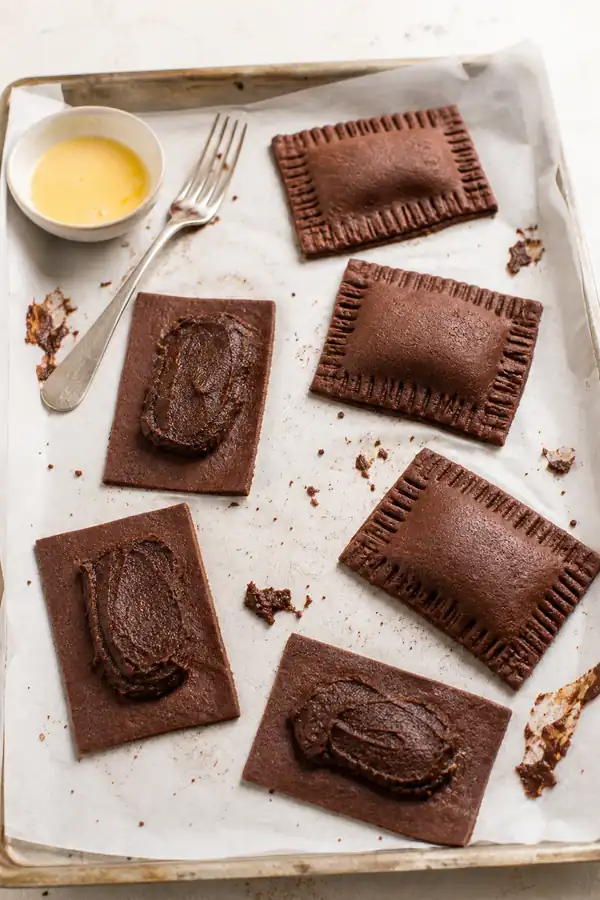
Prepare the filling while the dough chills, then assemble the pastries only when both components are cool. The recipe makes nine finished pastries from eighteen dough rectangles.
Total time: 3 hours and 40 minutes
-
Make the Cocoa Pastry
– Pulse the flour, pastry cocoa powder, granulated sugar, and salt in a food processor to combine. Add the very cold cubed butter and pulse until pea-size pieces remain. Alternatively, use a pastry cutter to work the butter into the dry ingredients in a large bowl.
– Add the ½ cup ice water gradually, stopping when the dough holds together when squeezed. Use the extra 1–2 tablespoons only if needed. Avoid processing the dough into a smooth paste. -
Chill the Dough
– Divide the dough into two equal portions. Press each into a rectangle about 1 inch thick, wrap, and refrigerate for at least 2 hours.
– If the chilled dough is too firm to roll without cracking, let it stand briefly at room temperature before trying again. It should remain cool, not soft or greasy. -
Cook the Chocolate Fudge Pop Tart Filling
– Combine the filling cocoa powder, brown sugar, whole milk, pinch of salt, and half the chopped chocolate in a small saucepan.
– Cook over medium heat, stirring constantly, until the chocolate melts and the mixture becomes smooth and thickened. Reduce the heat if it begins to catch on the bottom.
– Remove from the heat and stir in the remaining chocolate, butter, and alcohol-free vanilla flavoring. Transfer to a shallow bowl and cool until thick but spreadable. Do not assemble the pastries while the filling is warm or flowing. -
Roll and Cut the Pastry
– On a lightly floured surface, roll one dough portion slightly larger than 9 by 12 inches, approximately ⅛ inch thick, then trim to size.
– Divide the 9-inch side into three 3-inch sections and the 12-inch side into three 4-inch sections. This makes nine 3-by-4-inch rectangles.
– Repeat with the second dough portion for eighteen pieces total: nine bottoms and nine tops. Refrigerate the pieces briefly if they soften while you work. -
Fill, Seal, and Vent
– Line a large rimmed baking sheet with parchment paper. Whisk the egg with 1 tablespoon water to make the egg wash.
– Arrange nine bottom rectangles on the prepared sheet. Place about 1 tablespoon of thick, cooled fudge on each, leaving a clean ½-inch border.
– Brush the bare borders lightly with egg wash. Cover with the remaining nine rectangles, press gently around the filling to remove trapped air, and press the dough edges together. Crimp firmly with a fork.
– Prick the tops with a toothpick or skewer, piercing the upper dough layer to provide an escape route for steam. -
Freeze and Bake
– Freeze the assembled pastries for 20 minutes while the oven heats to 375°F (190°C).
– Brush the tops lightly with egg wash, then bake for 22–26 minutes, rotating the sheet halfway through.
– Look for dry, firm crimped edges, set tops, and bottoms that no longer look wet or shiny. Because the dough is already dark, use these texture cues rather than waiting for an obvious color change. -
Cool and Add the Icing
– Transfer the baked pastries to a wire rack and cool completely.
– Whisk the powdered sugar, glaze cocoa powder, light corn syrup, milk, and alcohol-free vanilla flavoring until smooth and thick but spreadable. Add extra milk only a few drops at a time if necessary.
– Spread a thin layer over each cooled pastry, leaving the crimped border visible. Add the sprinkles immediately.
– Leave uncovered until the icing is dry to a light touch before stacking or packing. Warm pastry, a thick icing layer, and humid conditions can all delay a neat finish.
Tips to Reduce Filling Leaks and Pastry Cracks
- Measure the filling. About 1 tablespoon per pastry leaves room for a secure seal. Extra filling is better saved than forced inside.
- Keep the border clean. Filling or excess flour between the dough layers can weaken the seal. Brush the bare border lightly with egg wash.
- Press before crimping. Gently remove trapped air around the filling, press the edges together, then reinforce the seal with a fork.
- Keep the dough cool. If the rectangles become floppy or greasy, refrigerate them before continuing.
- Let very firm dough soften slightly. If it cracks immediately under the rolling pin, wait about 5 minutes and try again rather than forcing it flat.
- Avoid excessive dusting. Use only enough flour to prevent sticking. Repeated additions of flour or cocoa can make the dough drier.
- Check the bottoms. Dark cocoa pastry can look finished before the underside has set. Look for a dry surface rather than wet-looking dough.
- Ice only cooled pastries. Keep the icing thick but spreadable and apply a thin layer. Do not add melted chocolate to the icing; it belongs in the filling.
Dairy-Free Chocolate Fudge Pop Tarts
- For dairy-free chocolate fudge pop tarts, replace the butter in both the pastry and filling with block-style dairy-free baking butter. Use dairy-free milk in the filling and icing, and choose semisweet chocolate and sprinkles labeled dairy-free.
- Avoid soft tub spreads in the pastry because their composition can change how the dough handles.
- Keep the egg-and-water wash unchanged. This variation still contains egg, so it is not vegan.
Storage, Freezing, and Reheating
Storing Baked Pastries
- Let the pastries cool completely before covering them. For a conservative approach to storing the milk-based filling, refrigerate leftovers in a covered container.
- Allow the icing to dry before stacking, and separate layers with parchment. For longer make-ahead preparation, use the unbaked-freezing method below rather than assuming these homemade pastries have the shelf life of boxed toaster pastries.
Freezing Before Baking
- Arrange the sealed, unbaked pastries on a parchment-lined tray and freeze until firm. Transfer to an airtight freezer container, separating layers with parchment, and freeze for up to 1 month. Leave them unglazed.
- Bake directly from frozen at 375°F (190°C), allowing additional time beyond the usual 22–26 minutes. Check for dry, firm edges and set bottoms rather than relying on an exact number of extra minutes.
- Cool completely before adding the icing.
Reheating
- Place pastries on a lined tray in a 325°F (165°C) oven or toaster oven. Begin checking after 6–8 minutes and continue until warmed through; refrigerated pastries may need longer.
- The icing may soften during reheating. When preparing pastries specifically to reheat later, leave them unglazed and add the icing after reheating and cooling.
- Do not use a slot toaster. Filling or icing can drip onto the heating elements.
Frequently Asked Questions
More Homemade Pop Tart Ideas
- For a fruit-filled contrast: Homemade strawberry pop tarts pair strawberry filling with a pink strawberry glaze.
- For a cinnamon filling: Homemade brown sugar cinnamon pop tarts use a spiced brown sugar center instead of chocolate fudge.
- For another chocolate variation: Homemade s’mores pop tarts combine chocolate-graham pastry, chocolate filling, and gelatin-free marshmallow creme.
Save These Chocolate Fudge Pop Tarts
Save these homemade chocolate fudge pop tarts for a chocolate-focused weekend baking project. For another cocoa-pastry variation with a different center, try our homemade cookies and cream pop tarts, filled with a cookies-and-cream cheesecake mixture and finished with vanilla glaze.