

The Biscoff cheesecake cups consist of fine cookie crumbs, creamy cookie butter cheesecake filling, and a thin layer of Biscoff spread on top, all served in individual glasses. These no-bake Biscoff cheesecake dessert cups are served in cups, and you are supposed to consume them with a spoon, not unmold them.
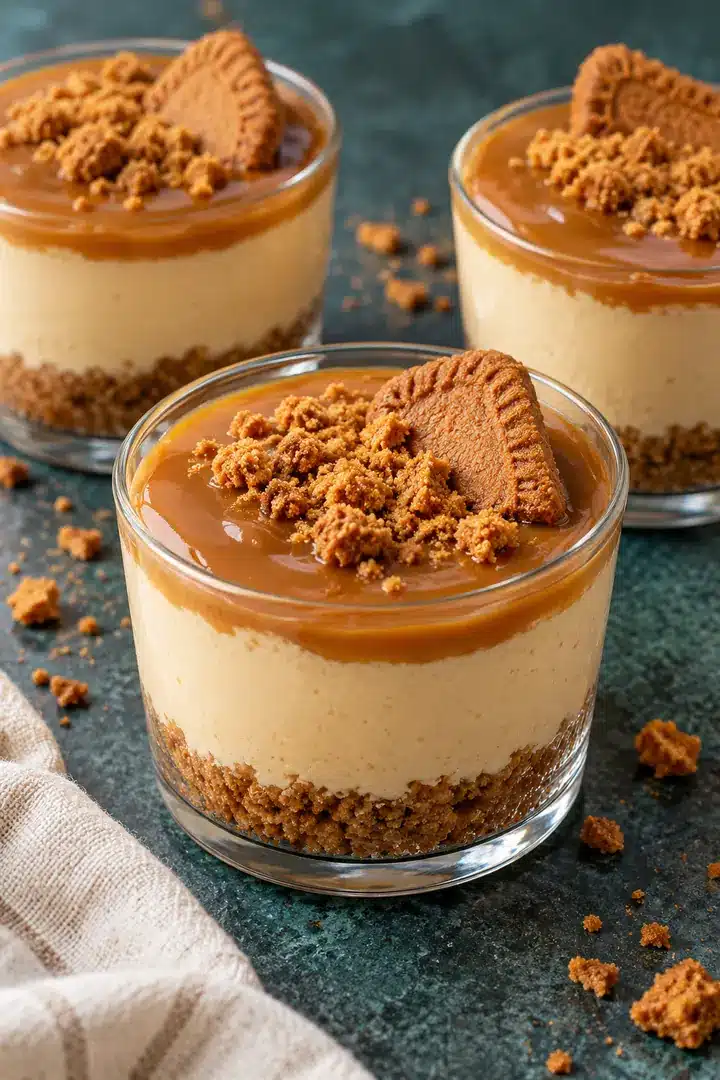
Prepare the filling, layer it, then refrigerate before spreading the topping over it. Add fresh cookie crumbs close serving so they remain crunchy. The layers are visible in small glass cups, and a basic piping bag helps keep the sides tidy.
Table of Contents
Why You’ll Love These Dessert Cups
The foundation, filling and topping are all infused with caramelized cookie flavor, with tangy cream cheese to balance the sweet spread. The thin coating adds a bit of extra cookie butter to each bite without overpowering the contents.
And the single format means no cutting or unmolding. You can use a scale to divide the dessert, cover the cups on a tray and just do the servings you need.
Biscoff Cheesecake Cups
Ingredients
Equipment
Method
- Crush and combine. Crush 120 g Original Biscoff cookies to fine sandy crumbs, without large shards. Stir with 24 g melted unsalted butter until evenly damp.
Portion. Divide among eight clear 4-fluid-ounce (120 ml) dessert cups: 18 g buttered crumbs per cup, roughly 2 level tablespoons.
Keep it spoonable. Level gently with the back of a teaspoon. Do not compact them into a firm crust; the base should break apart under a dessert spoon. Refrigerate while making the filling. - Whip the cream. In a clean bowl, whip 3/4 cup (180 ml) cold heavy whipping cream to firm peaks: the lifted whisk should leave a peak that stands, while the cream still looks smooth.
Smooth the cheese mixture. In a second bowl, beat 8 ounces (226 g) softened full-fat block cream cheese until completely smooth, scraping the bottom and sides. Beat in 125 g room-temperature smooth Biscoff spread and 20 g sifted powdered sugar just until uniform.
Fold gently. Fold in one third of the whipped cream to lighten the mixture, then fold in the rest with a spatula. Stop when no white streaks remain. The filling should hold a soft mound and a broad spatula ridge rather than run like a sauce. - Measure the filling. Divide all the filling evenly between the eight crumb bases, about 68–70 g per cup; start with about 1/3 cup and use the scale to portion the remainder.
Prepare the bag. For piping, stand a bag in a tall glass, fold the cuff over the rim, and spoon in the filling. Fit a plain 1/2-inch opening or snip the bag to that width.
Fill neatly. Lower it close to the crumbs, squeeze steadily, and lift as the cup fills. Keep the opening near the surface so filling spreads outward without smearing the walls. Alternatively, add small spoonfuls against the center. Smooth with a teaspoon and leave space below the rim for the topping and garnish. - Chill the filling. Cover without touching the filling and refrigerate for at least 2 hours, until the surface is cold and resists a light spoon touch.
Warm and cool the spread. To warm the separate 64 g topping spread gently, put it in a dry heatproof bowl set over warm water, keeping water out of the spread, and stir until it falls from a spoon in a thin ribbon. Remove from the warmth and let it become barely warm, never hot.
Add the thin topping. Divide over the eight chilled cups, 8 g per cup (about 1 1/2 teaspoons). Tilt gently or guide with the back of a teaspoon to form a thin layer; a drizzle is also fine. If it sinks, stop and chill the cups longer. Refrigerate for another 30 minutes so the topping settles. - Add fresh crumbs. Just before serving, crush the separate 16 g garnish cookies and add about 2 g crumbs to each cup.
Finish and serve. If using the optional 4 extra cookies, halve them and add one half per cup. Serve cold with small spoons. Keep any garnish for later portions dry and separate until those cups are served.
Notes
- Cover and refrigerate at 40°F (4°C) or colder. Plan assembled base, filling and spread topping up to 24 hours ahead; keep fresh cookie garnish separate. The base softens overnight. Use refrigerated leftovers within 3 days, expecting softer crumbs.
- Refrigeration is preferred for this version. Freezing and thawing may alter the creamy texture and soften the crumbs.
- Serve cold. Allow about 25 minutes active work plus at least 2 hours chilling before topping and another 30 minutes afterward. Per standard cup: 18 g base, about 69 g filling, 8 g topping and 2 g fresh crumbs. Filled dessert volume is approximately 105–110 ml, depending on aeration; cup capacity is 120 ml. For 16 smaller portions, halve each layer and use 2-fluid-ounce (60 ml) cups.
Ingredients for Biscoff Cheesecake Cups
Biscoff Cookie Crumb Base
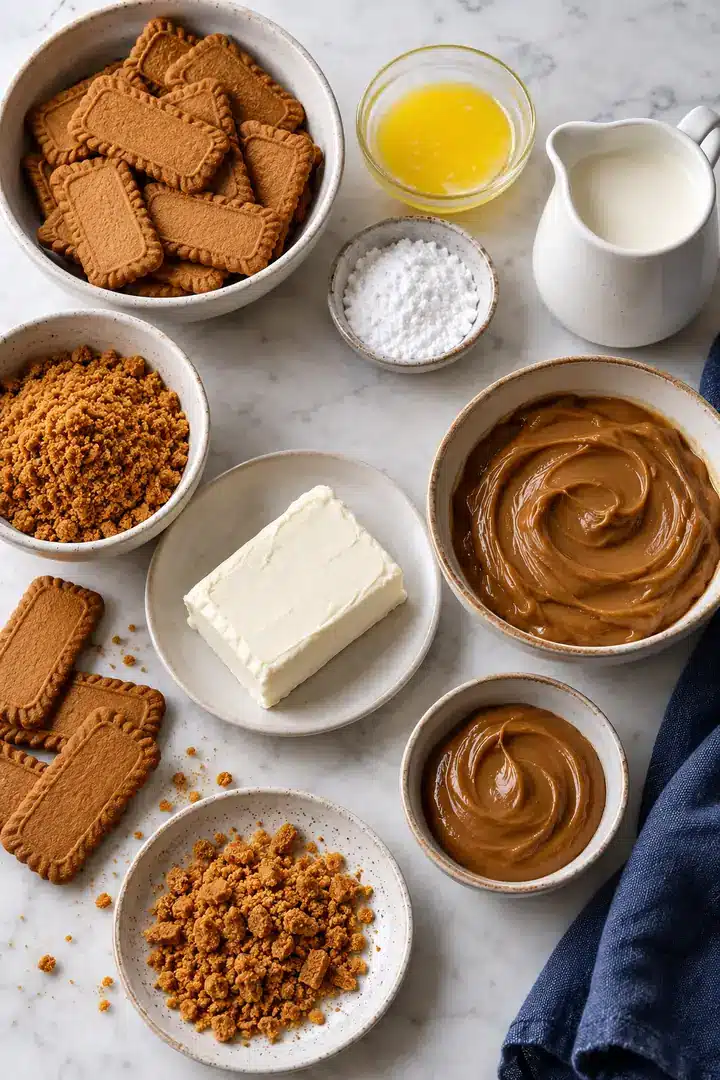
For Lotus Biscoff cheesecake cups, use Original cookies and smooth spread as the reference ingredients. The crumbs should look like fine sand. A little butter binds them loosely so the chilled base is easy to scoop.
- 120 g Original Biscoff cookies: finely crushed, about 1 cup crumbs, use the weight because grinding changes volume.
- 24 g melted unsalted butter: about 1 tablespoon plus 2 teaspoons, mixed evenly through the crumbs.
Creamy Cookie Butter Cheesecake Filling
For Biscoff cheesecake cups with cream cheese, choose a full-fat block rather than a soft spreadable tub. Let it soften until pliable, but keep the whipping cream cold. Smooth spread gives these cookie butter cheesecake cups predictable piping texture. Lotus Biscoff’s official cheesecake preparation guide also pairs a cookie base with spread in a cream cheese filling.
- 8 ounces (226 g) full-fat block cream cheese: beat smooth before adding anything else.
- 125 g smooth Biscoff spread for the filling: about 1/2 cup, at room temperature this portion is separate from the topping amount.
- 20 g sifted powdered sugar: about 2 1/2 tablespoons, a modest addition because the cookies and spread already supply sweetness.
- 3/4 cup (180 ml) cold heavy whipping cream: at least 35% fat, whip separately for an airy filling.
Biscoff Spread Topping
Measure the topping into its own bowl before starting so you don’t have to reserve any from the filling. A thin layer is easier to eat from a small cup than a thick cap.
- 64 g smooth Biscoff spread: about 4 tablespoons for all eight cups, or 8 g (about 1 1/2 teaspoons) per cup.
Cookie Garnish
Keep this separate from the buttered base. Crush these cookies close to serving rather than letting the garnish sit against the cheesecake overnight.
- 16 g extra Original Biscoff cookies: freshly crushed, about 2 tablespoons crumbs, divided among eight cups.
- 4 additional cookies, optional: halve for one-half per cup.
How to Make No-Bake Biscoff Cheesecake Cups
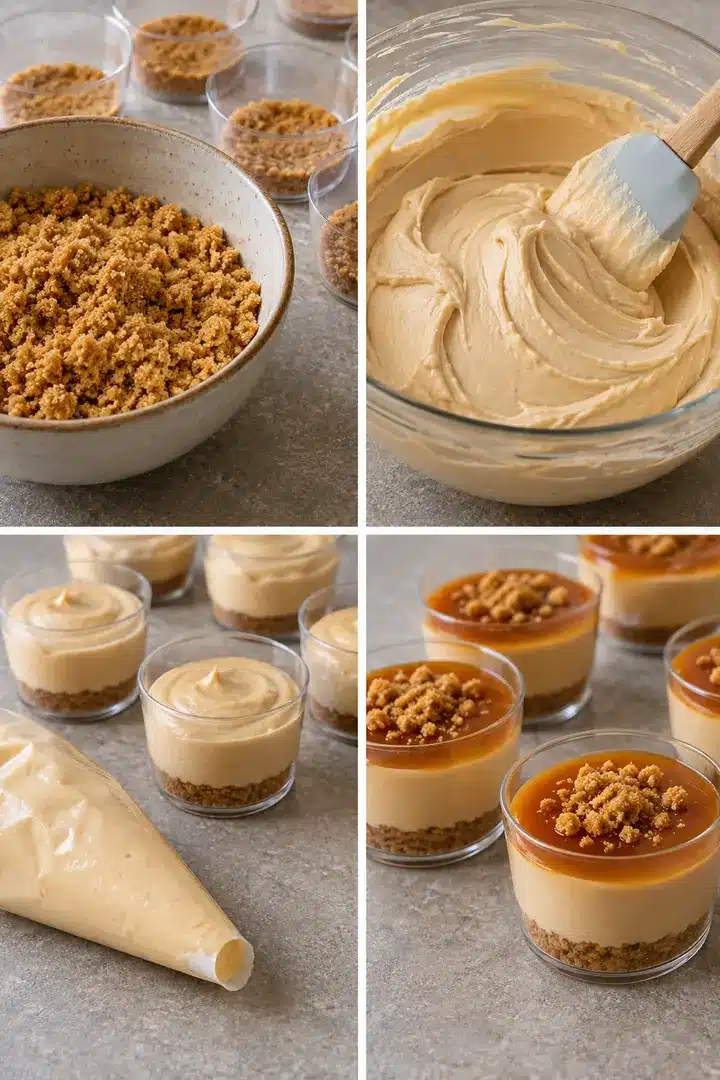
Work in five stages, keeping the crumb base loose and the topping thin. Portion by weight for even layers, spoon measures are approximate.
Total time: 2 hours and 55 minutes
-
Prepare the Cookie Crumbs
Crush and combine. Crush 120 g Original Biscoff cookies to fine sandy crumbs, without large shards. Stir with 24 g melted unsalted butter until evenly damp.
Portion. Divide among eight clear 4-fluid-ounce (120 ml) Dessert cups: 18 g buttered crumbs per cup, roughly 2 level tablespoons.
Keep it spoonable. Level gently with the back of a teaspoon. Do not compact them into a firm crust, the base should break apart under a dessert spoon. Refrigerate while making the filling.
-
Mix the Biscoff Cheesecake Filling
Whip the cream. In a clean bowl, whip 3/4 cup (180 ml) cold heavy whipping cream to firm peaks: the lifted whisk should leave a peak that stands, while the cream still looks smooth.
Smooth the cheese mixture. In a second bowl, beat 8 ounces (226 g) softened full-fat block cream cheese until completely smooth, scraping the bottom and sides. Beat in 125 g room-temperature smooth Biscoff spread and 20 g sifted powdered sugar just until uniform.
Fold gently. Fold in one third of the whipped cream to lighten the mixture, then fold in the rest with a spatula. Stop when no white streaks remain. The filling should hold a soft mound and a broad spatula ridge rather than run like a sauce.
-
Spoon or Pipe into Cups
Measure the filling. Divide all the filling evenly between the eight crumb bases, about 68–70 g per cup; start with about 1/3 cup and use the scale to portion the remainder.
Prepare the bag. For piping, stand a bag in a tall glass, fold the cuff over the rim, and spoon in the filling. Fit a plain 1/2-inch opening or snip the bag to that width.
Fill neatly. Lower it close to the crumbs, squeeze steadily, and lift as the cup fills. Keep the opening near the surface so filling spreads outward without smearing the walls. Alternatively, add small spoonfuls against the center. Smooth with a teaspoon and leave space below the rim for the topping and garnish.
-
Chill and Add the Biscoff Topping
Chill the filling. Cover without touching the filling and refrigerate for at least 2 hours, until the surface is cold and resists a light spoon touch.
Warm and cool the spread. To warm the separate 64 g topping spread gently, put it in a dry heatproof bowl set over warm water, keeping water out of the spread, and stir until it falls from a spoon in a thin ribbon. Remove from the warmth and let it become barely warm, never hot.
Add the thin topping. Divide over the eight chilled cups, 8 g per cup (about 1 1/2 teaspoons). Tilt gently or guide with the back of a teaspoon to form a thin layer, a drizzle is also fine. If it sinks, stop and chill the cups longer. Refrigerate for another 30 minutes so the topping settles.
-
Garnish Before Serving
Add fresh crumbs. Just before serving, crush the separate 16 g garnish cookies and add about 2 g crumbs to each cup.
Finish and serve. If using the optional 4 extra cookies, halve them and add one half per cup. Serve cold with small spoons. Keep any garnish for later portions dry and separate until those cups are served.
If you’re wondering how to melt Biscoff spread for cheesecake, the clues are mild warmth and a flowing ribbon. Above the warm-water technique prevents a runaway microwave time: stop heating when the spread is flowing then let it cool until just warm before it reaches the cold filling.
Biscoff cheesecake cups, no gelatin. Block cream cheese adds body, whipped cream folded in adds lightness, and chilling thickens the mixture. Keep them in their cups when serving, the aim is a soft spoonful, not a freestanding cheesecake.
What Size Cups Should I Use?
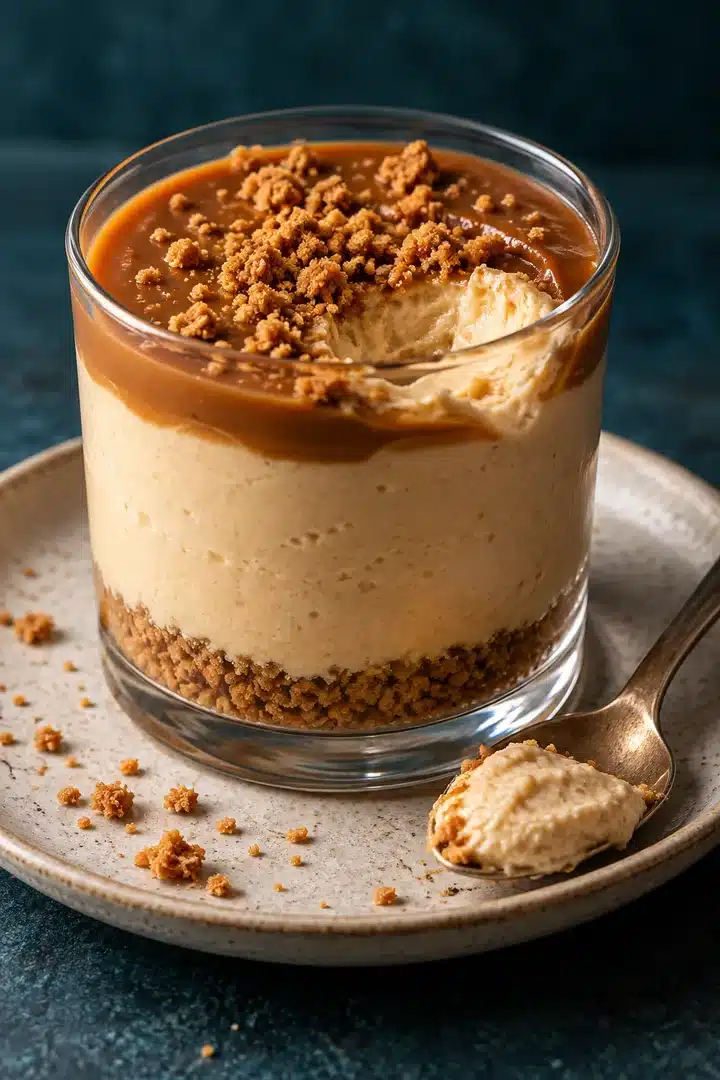
Use eight clear 4-ounce (120 ml) dessert cups for these Biscoff cheesecake cups. Leave a little space at the top for the topping and garnish.
Standard 4-Ounce Cups
For each of the 8 servings, use:
- Cookie base: 18 g buttered Biscoff crumbs.
- Cheesecake filling: About 68–70 g (start with roughly ⅓ cup).
- Biscoff topping: 8 g cookie butter spread.
- Garnish: 2 g crushed Biscoff cookies.
Divide any remaining filling evenly among the cups for consistent portions.
Mini 2-Ounce Cups
For mini Biscoff cheesecake cups, use sixteen 2-ounce (60 ml) cups and reduce each layer by half:
- Cookie base: 9 g.
- Cheesecake filling: About 34–35 g.
- Biscoff topping: 4 g.
- Garnish: 1 g.
Want a cheesecake you can remove from its mold? Try these no-bake Biscoff mini cheesecakes. They use a muffin pan and a firmer crust, while these dessert cups have a softer, spoonable base.
Tip: Use a kitchen scale for even portions, and fill one cup first to check that there’s enough room for the topping.
Make-Ahead and Storage Tips
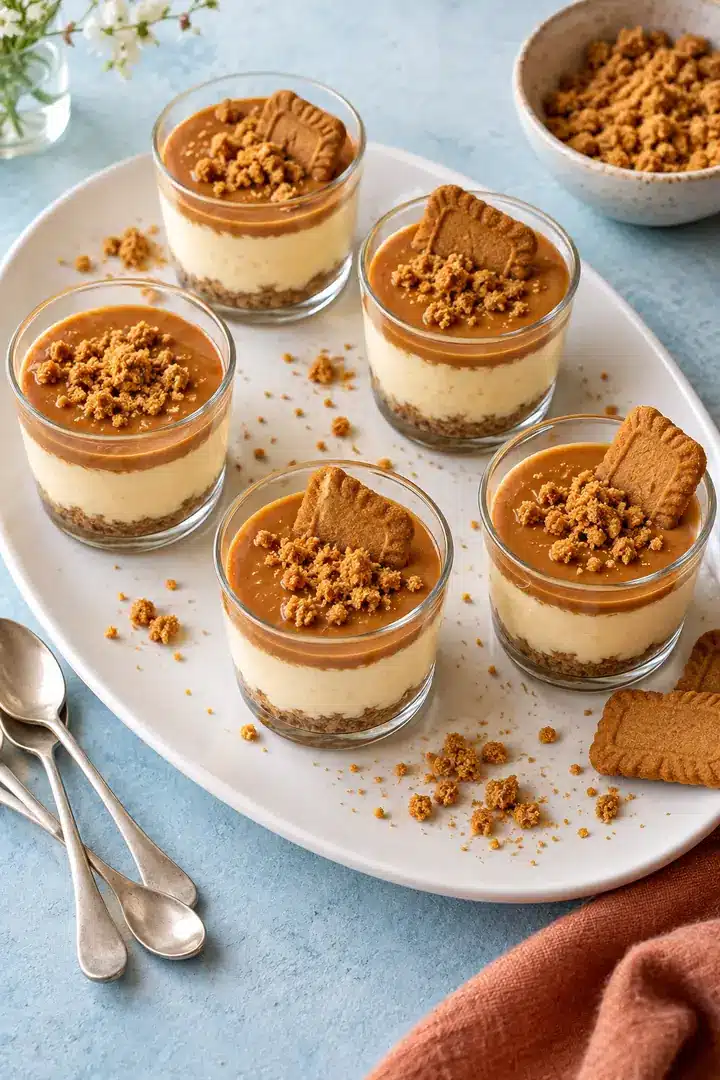
These make-ahead Biscoff cheesecake cups are perfect for preparing in advance. Keep them refrigerated and add the crunchy garnish just before serving.
- Make ahead: Assemble the cups up to 24 hours before serving.
- Add the Biscoff topping: After the initial chill, spread the cookie butter topping over each cup and let it settle for 30 minutes before covering.
- Refrigerate properly: Keep the cups covered at 40°F (4°C) or colder.
- Keep garnishes crisp: Store extra Biscoff cookies in an airtight container and crush them just before serving.
- Store leftovers: Refrigerate promptly and enjoy within 3 days.
- Avoid freezing: Thawing can affect the smooth, creamy cheesecake texture.
Tip: The cookie base softens slightly overnight. For the best crumb texture, assemble the cups on serving day and allow the full chilling time.
Frequently Asked Questions
Save This Recipe
Save this recipe for your next gathering, and keep the cookie garnish separate until the cups are ready to serve.